It’s pretty self explanatory from the pictures shown above.
Just shape the pillsbury biscuits to look like a donut. Spray the air fryer tray and the donuts with some pam spray. Bake it at 375 for 6 to 8 minutes. Make the donut glaze by combining icing sugar with a little milk or cream. Spread the glaze all over donuts and it’s time to DECORATE!!!! 😀
Honestly, never even really occurred to me where egg tarts actually come from… as in from which culture. Growing up, I always remember eating them when my parents would bring us to go eat dim sum on weekend mornings. Those were very fond memories indeed. These days, you can pretty much eat dim sum any day.
But this I do know – while it is a Asian dish, it has influences from the Portuguese. Might be the reason why some Asian places call them Portuguese Egg Tarts.
So usually, I will try to make my own crust and I have a really wicked awesome flaky pie crust which I feel will work great for the egg tarts but this weekend, Ryan and I weren’t feeling really well so I just really didn’t feel like making it from scratch so store bought ones will have to do for this weekend 😀
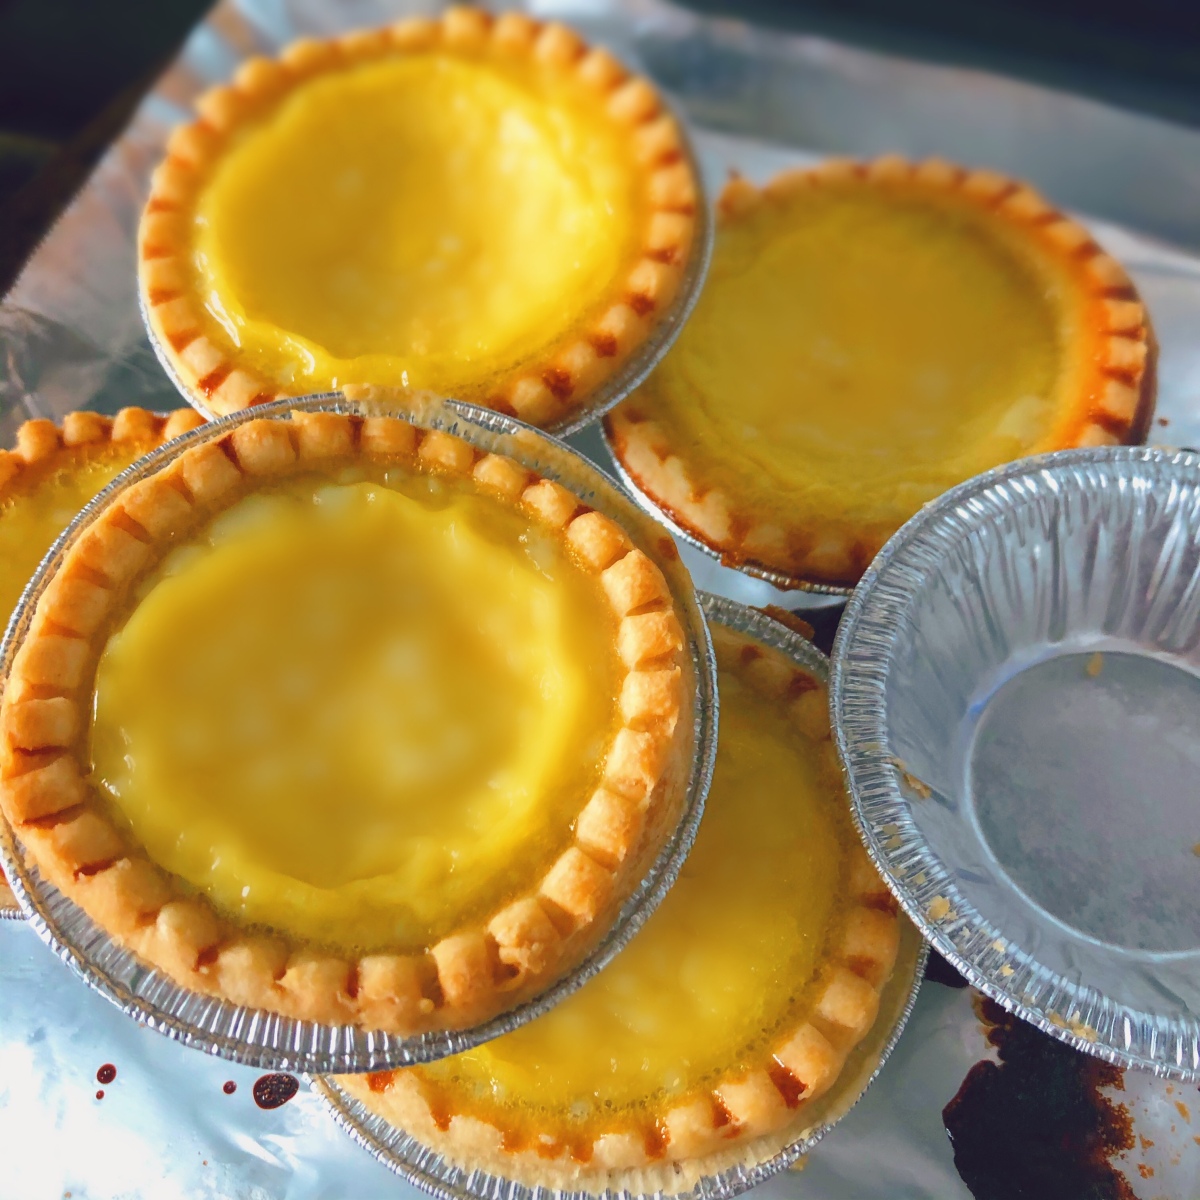
And really, Tenderflake Tart Shells works perfect with Egg Tarts.
There are many many egg tart recipes but remembering that this is a Easy Peasy one, so I did skip some steps such as straining the egg mixture. Straining the egg mixture/filling helps remove any lumps and ensures your custard filling comes out looking smooth & pretty.
Also, it usually ask you to chill the filling in fridge first. Again, skipped by this mommy. One thing to note too that my original recipe usually uses evaporated milk but sometimes when I dun have that, I use my coffee cream instead. I just use 2 tbsp of coffee cream instead of 1/4 cup evaporated milk.
Since I am baking for my family and not to sell, I really could care less about straining it. Maybe when I have more time or when I decide to see if anyone will buy it from me at the Farmers Market lol
Here goes the super easy ingredients:
1 box of Tenderflake Tart Shells (12 tarts)
4 beaten eggs with a pinch of vanilla extract & salt
¾ cup hot water
6 tablespoons sugar
1/4 cup evaporated milk
My Easy Peasy Lazy Mommy Recipe:
To make the custard filling, stir in sugar in hot water and let it cool slightly
Once water is cooled, add in your beaten eggs, vanilla, salt and evaporated milk. If you don’t have evaporated milk, I would just add 2 Tbsp of coffee cream or half & half
Mix it all up thoroughly
Strain it if you want your custard to look smooth and pretty and without lumps but I didn’t.
Pour it into the 12 tart shells till about 80% full
Bake at 400 f for 20-25 mins. Mine came out at 25 mins Cos I filled the tart shells to the brim lol. But if you fill it to 80% full, 20 mins works suffice
And that is it. Super easy. Super lazy recipe. And now my son gets to have a taste of what my parents would bring me to eat on a Sunday morning 😀 and he ate 2 for breakfast this morning so I’m gonna call that a Mommy Win!
Green Pea Cookie, I feel is one of those very understated cookie. If Chinese New Year Cookies were a group of friends, Green Pea would be the wallflower, Pineapple Cookies would be my popular & vivacious friends and Me, I am definitely the Walnut Cookie, the Nutty & Klutzy one in the group haha 😛
Ryan is definitely a NUTTY Walnut Cookie like his mommy too 😀 lol
Lol anyhow, while Green Pea Cookie is very often overlooked compared to her more flashy friends, she is so so yummy. And it’s the type of cookie that the more you eat, the more you want more.
And it is a very easy recipe. Oh well maybe not my first round Cos the first time I made it, I had to wash the peas, dry them, roast and then grind them 😥 . Definitely not this Lazy Mommy idea of a lazy way to bake lol.
I might be lazy but I’m definitely determined when it comes to finding lazy ways to bake quality food. So this time, I had this bright idea and it actually worked!!!! 😉
Instead of fresh peas, I used these green pea snacks 😎 & they work perfectly! 😀 . Just make sure you are using the plain flavored ones and not the Wasabi Spicy ones lol. Otherwise, be prepared for a very spicy cookie hahaa..
Ingredients
1 Cup Ground Green Peas
1.5 Cup Flour
2/3 Cup Icing Sugar
100 gram Vegetable Oil
1 beaten Egg Yolk to glaze the top of cookies
Instructions
Combine top 4 ingredients in a mixing bowl until well mixed into a dough
If too dry, add a bit more oil gradually
If too oily, add a bit more flour gradually
I find this recipe very forgiving
Glaze the top of cookies
Bake in Vortex Plus for 12 mins
Switch the trays midway
When it’s done, let it cool before storing it. This would stay well in freezer as well.
Roll prepared dough out on a clean floured surface
Spread melted butter all over the rolled out dough
Sprinkle generously the brown sugar all over
Tightly roll dough up. I cut away the two corner sides
Slice them into 6 rolls
Place cinnamon rolls in a greased baking pan. (I use a square pan)
Cover with towel and let rise again for 60 mins
Preheat oven to 350 degrees F. Remove towel and bake cinnamon rolls for 20-25 minutes or until just slightly golden brown on the edges. Mine took 20 minutes. You want to underbake them a little so they stay soft in the middle, that’s why we want them just slightly golden brown
I have never like frosting on my Cinnamon Buns so this is good enough for me and my family
While waiting for the dough to rise, I thought why not use part of the dough to bake something else and see if it works out & Ta Da! That’s how these Cinnamon Buns were born as well 😀
But meanwhile, let’s take a look at how these Easy Peasy Dinner Rolls are made 😀
Ingredients:
2 cups warm milk
2 tablespoons instant dry yeast
1/4 cup white sugar
1 teaspoons salt
6 tablespoons salted butter softened
2 large eggs
6 cups all-purpose flour
1 tablespoon melted butter to brush the buns after they are out of oven
Instructions:
In my mixer bowl with a dough hook, dump warm milk, yeast, sugar, salt, butter, and eggs in this order
Add in 6 cups of flour, turn mixer on to a low speed. Once the flour starts to incorporate into the dough, increase to medium speed
Mix until the dough pulls away from the sides of the bowl. The dough mixture should be slightly sticky and soft
Add more or less flour until the dough reaches the desired consistency. I find 6 cups work perfect for me
Transfer the dough to a lightly greased big mixing bowl. Cover with a towel and let rise 90 minutes
Do a happy dance when you see it rise after 90 minutes 😀
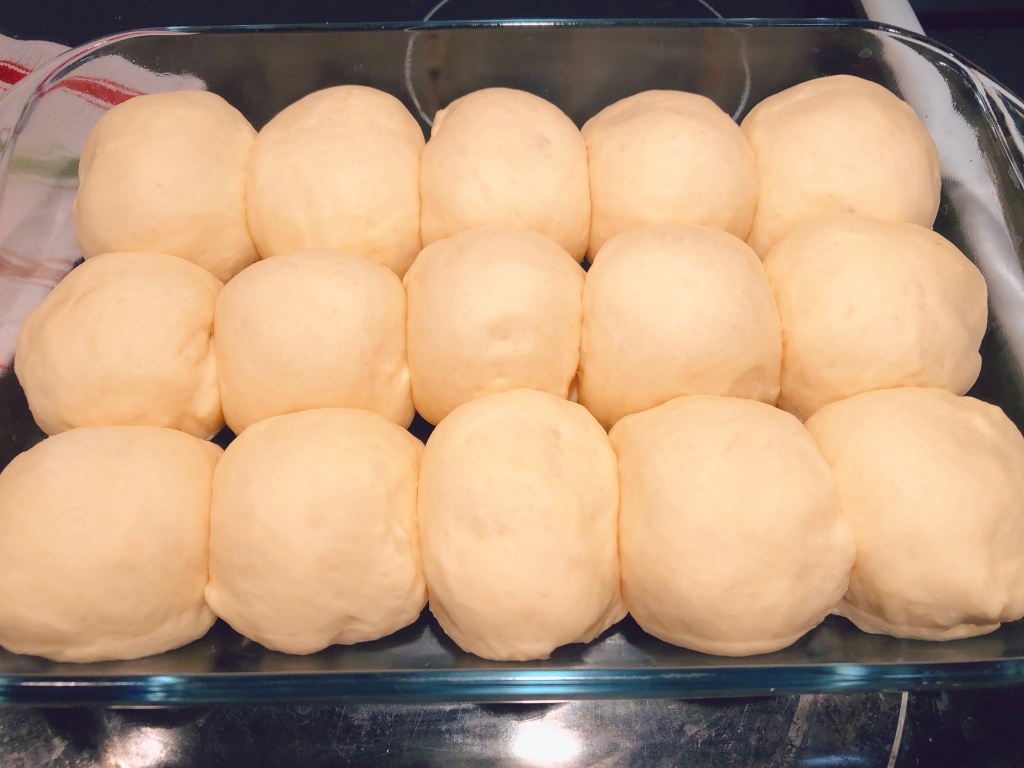
Punch down the dough and form into 15 equal sized rolls. You can use a food scale but I just estimate it by feel
Place on a greased baking tray with space between each roll. Cover and let rise 1 hour
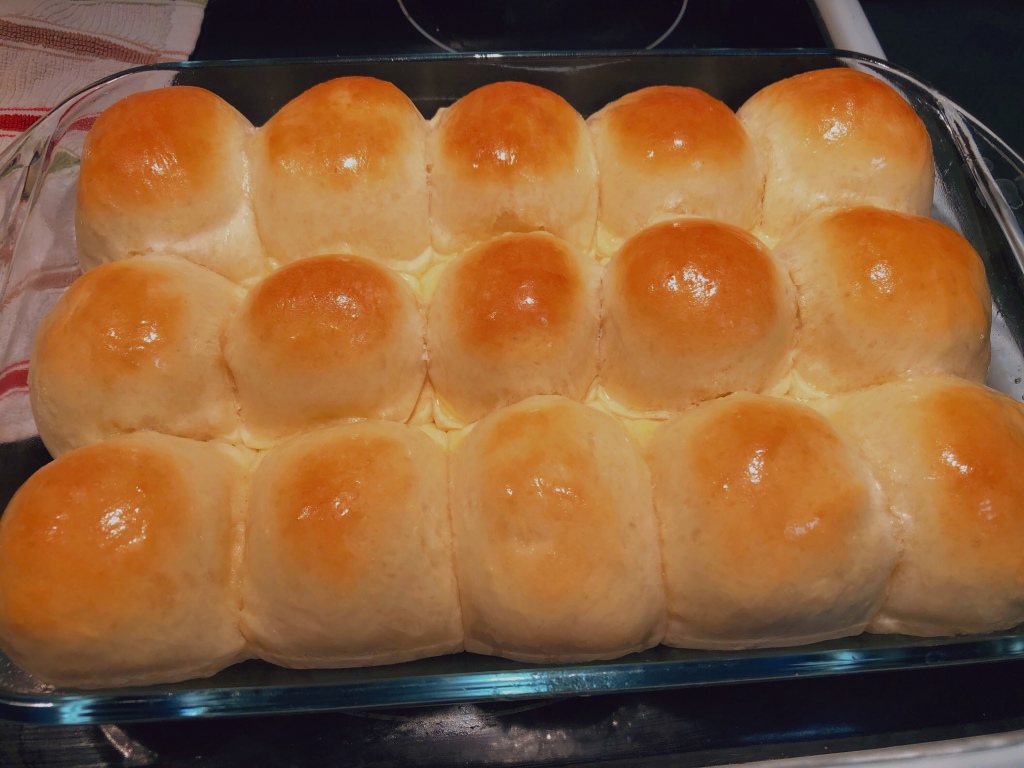
Preheat oven to 375 degrees. Bake the rolls for 12 to 14 minutes, until lightly browned.
Remove rolls from oven and brush with melted butter. Serve the rolls warm or if you are making them the night before like I was, let them cool down first before storing in a zip lock bag
NOTES:
This recipe easily makes 24 rolls but I saved a portion of the dough to make Cinnamon Buns so I only made 15 rolls but if you plan to use the whole dough, divide them into 24 rolls. If you are interested in the Cinnamon Bun recipe, you can click them here
I made this the night before our Thanksgiving Dinner & just make sure the buns get cooled down before storing it in a ziplock bag
Dinner rolls always taste best when they are warm and fresh out from oven but sometimes, it isn’t possible to bake them just before the big dinner so no worry. They taste good on its own the next day or microwave it for 5-10 seconds before you eat them and they are good 😀
Disclaimer: This is not a sponsored post. The Young Living Essential oils were sent to me as a personal gift from a girlfriend. I receive no compensation from this review. Please always use caution when using essential oils, and always ask the advice of a professional. All content is based on my personal experiences of a Lazy Mommy and purely for informational & entertainment purposes and should not be relied on as professional advice.
Okay. Confession of the day – I don’t use Essential Oil much. Other than the cheapo Thieves Oil and Tea Tree Oil that I buy to sanitize my house after a bout of illnesses, I really have never cared much for Essential Oil. So when a friend of mine told me that you could bake with Essential Oils, I was pretty skeptical. I mean why use Lemon Essential Oil when I can use Lemon Zest. But I’m always up to the challenge and when a girlfriend offered to send me some to try, there was no way i could have turned it down 😀
Thanks Elaine!
Being the typical cynic though (a typical Virgo trait lol), I set out to read and read online about Essential Oils. I had heard a lot about Young Living but hey, I wasn’t just about to trust on face value from their website. I mean which company would say their products suck on their own website? LOL.
So the CFA (Canadian Federation of Aromatherapists) actually recently just released a safety statement regarding essential oil usage. You can read the whole safety statement here. But to summarize for you,
Health Canada does not:
recommend internal uses of essential oils as a stand-alone product. What that just means is you should not be consuming a edible grapefruit essential oil by itself as if you are drinking water. Adding 2 drops to a cake mix is fine.
Now,I will never claim to be an expert after researching it online but KEY TAKEAWAYS for me after the online research says to me the following:
Never use essential oils without diluting them
A small amount of edible essential oil can make a huge impact on flavor in any dish. Essential oils are potent. I recommend using only 1-2 drops at first, or even the toothpick method when cooking with essential oils: Stick a toothpick through the oil dropper to absorb the oil, then swirl the toothpick through wet ingredients. Give it a taste and gradually add more flavor to your liking
Never consume essential oil on its own. Instead, use 1 to 2 drops of edible essential oil on a recipe
Essential oils can be great substitutes for fresh herbs, citrus zest and juice, and spices such as oregano, lime juice, or ground clove.
Not all essential oils can be used in cooking or baking
Just like I would inform someone that I have nuts in my cupcakes (just in case that someone has a nut allergy), it just makes common sense to me to let someone know you used essential oil in your baking. When I brought my grapefruit cupcakes to work, I told everyone it was made with 1-2 drops of grapefruit essential oil. No one had an issue and they ate it happily.
Always follow the label instructions and never exceed the amount suggested.
Always keep out of reach of children.
If you are pregnant, nursing, taking medication, or have a medical condition, consult a health professional prior to use.
OKAY Now with all the boring part out of the way, I am wracking my brain on what to bake. I bake so many things with lemon zest and i always have lemons at home so I wanted to try something i typically wouldn’t have at home so I chose to bake with their Grapefruit Essential Oil.
YOUNG LIVING GRAPEFRUIT ESSENTIAL OIL (VITALITY SERIES)
I DO NOT LIKE to eat grapefruits on its own. Tried it once in my 20s when i was on a diet and Yucky 😦 . But I have always loved tasting grapefruit as part of a recipe. Although i love grapefruit flavored baking, I never have any grapefruits at all cos they would just all get rotten before I remember to use them, a Grapefruit essential oil might be this Lazy Mommy’s solution 😀
It was a Saturday. I have a bazillion things to do so am using a cake mix so it is easier to bake with Ryan.
#noshame #lol #dunjudge #whatever
So What’s my Verdict on Young Living?
I used the Grapefruit essential oil on both the batter and the frosting – 2 drops on each. Everyone likes it. While I probably will still use Lemon zest (as I have many lemons at home lol), I totally would use edible essential oils for ingredients that I don’t always have at home I already can think of a few that is making me super excited 😀 – Lemongrass, Lavender, Orange, Peppermint, Basil and Cardamon.
I really like it that Young Living makes it a breeze in helping you know which essential oil can be used in cooking and baking – their Vitality series. Their Vitality series of essential oil are specifically labeled for internal use with directions on how to do so safely. Vitality line is Young Living offering of essential oils that are safe for ingestion when label directions are followed.
I used to think that Essential Oil brands were all the same so I am really surprised at the strict quality control and standards Young Living set for their products. Not all essential oils are created equally. Young Living stand by their process of sourcing products from carefully vetted corporate-owned farms, partner farms, and Seed to Seal-certified suppliers and testing them extensively.
Beautiful Saturday and I really wanted to make pancakes for lunch for us. LOL I missed the breakfast part as I totally slept in and Daddy totally took care of breakfast for Ryan. So I thought why not make pancakes for lunch? Then I had an even better idea. Why not make pancake muffins???
They are easy to make, doesn’t require flipping and watching the stove. And best thing is that Chef Ryan and I can do this together 😀 . How fun would that be?
Of course, that actually meant that I would have to clean my kitchen. Oops. Clearly did not think this through enough LOL but whatever, we are so doing this today!!
Ryan and I had so much fun baking these today. Sure, there were more things to clean up but oh well, such is life 😀
Hope you enjoy Chef Ryan’s baking video 😀 😀 😀
Some Things To Note for this Recipe:
YES!! You can totally freeze these. They are perfect for taking one out the night before & by morning, Ryan can have them as breakfast or I can put it in his lunch box
We use dark chocolate chips, blueberries and strawberries as toppings but the sky is the limit and you can use other toppings that your heart so desire
If you have a sweet tooth, add 1/2 cup sugar instead of 1/4 cup
Easy Peasy Pancake Muffins
Ingredients
1 1/4 Cup Pancake Mix
1/2 Cup Quick Oats
1/4 Cup Sugar
Dash of Salt
1 Large Egg
1 Cup Milk (I use 2%)
1/4 Cup Melted Butter
Dark Chocolate Baking Chips
Blueberries
Cut Strawberries
Directions
Preheat oven to 350 degrees. Add pancake mix, oats, sugar and salt in a bowl and give it a good mix
Add egg, milk and melted butter & whisk everything in until blended
Easiest thing to make for your kids and will work as a baby led weaning recipe too. Feel free to use other vegetables and meat. This isn’t a strict recipe. I just happened to have bell peppers and leftover deli ham in my fridge so that was what I used but i have used bacon bits, diced up turkey deli, diced mushrooms, chopped up spinach…you get the drift. This really is a recipe that you can customise to your own liking. I like to add a little salt and pepper but you can omit that if you prefer it not to have any. This is a really great recipe for the freezer. I usually make a batch of them and freeze them. When i know i need one for the next day for ryan packed lunch, I take one out the night before and it be all thawed and ready to eat the next day. Or if you forget to take it out the night before, just heat them up slightly in microwave and there you go. So easy peasy.
How to cook "with visual instructions" "using familiar ingredients from your local grocery stores" healthy, traditional and delicious Japanese dishes!!
................... for lovers of ice cream. Your free on line magazine for sweet frozen treats. Recipes, inspiration, artisanal ideas for your delectation.