Instant Pot Nasi Lemak (Coconut Milk Rice)

So before I explain what Nasi Lemak is, I want to explain why I have never attempted to cook this even though I could have googled a long time ago on the recipe. Like Singapore Chicken Rice, this is a dish that has more than 1 component. It’s not like Beef Stroganoff or Cabbage Rice Soup where there is just 1 main dish. With Nasi Lemak, the rice and the fried chicken feels like the most important components for me. Yes. There are other components but since I don’t have most of the ingredients here, I’m just going to focus on the rice and the fried chicken that makes up this famous Singapore dish.

So my challenge today is to be able to replicate Nasi Lemak with using just 1 Instant Pot. And I succeeded! 😀

So now, let me tell you what is Nasi Lemak. Wikipedia states that Nasi Lemak is a Malay fragrant rice dish cooked in coconut milk and pandan leaves (also called Screw Pine Leaves). It is a very popular Southeast Asia dish and you can find it everywhere in Malaysia and Singapore.

My Western friends and hubby will find this part strange but to us, this is a dish that can be served as breakfast, lunch or dinner. Because it is so popular, you can find many variations of the dish but it is always rice cooked in coconut milk and pandan leaves and it is usually always accompanied by a no. of smaller side dishes like fried chicken (Ayam Goreng), deep fried anchovies, peanuts, fried egg, sliced cucumber and sambal chilli

If you are in Singapore and wishes to try Nasi Lemak, you can find them everywhere. But if you want to know where the Top 10 Best Nasi Lemak is in Singapore, check out the list at Singapore Foodie 😀

Some Notes About This Recipe:

  • Obviously, given the restraints I have in terms of grocery shopping in my town, I am not going to be able to replicate the dish and its side dishes 100%
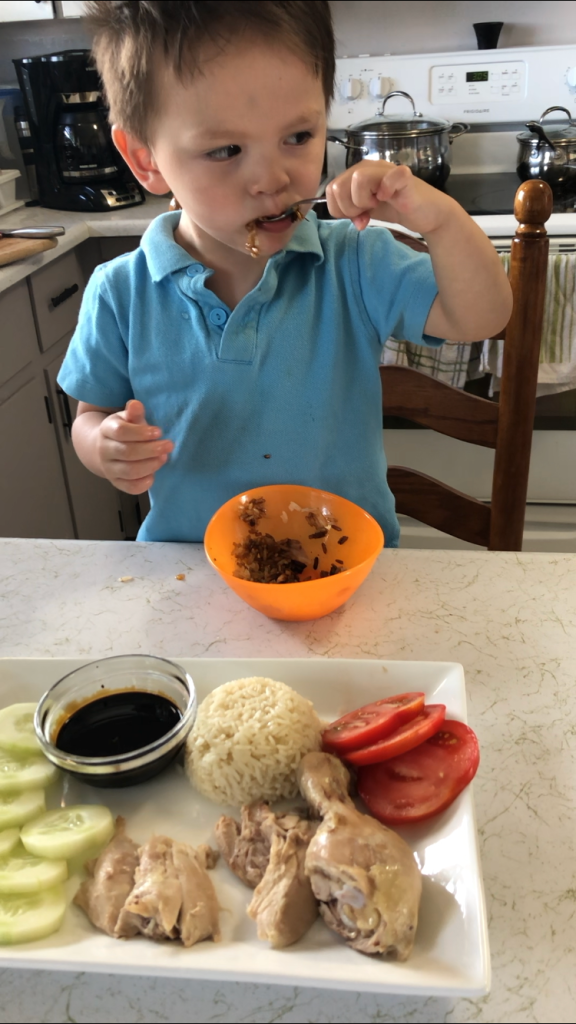
  • I wanted to make fried Chicken as in Ayam Goreng but I don’t want to have to deep fry so this is a very easy peasy version and is not going to taste like Ayam Goreng but honestly, I was pretty happy with how the chicken turned out. My toddler and hubby loves it
  • Whole concept of Instant Pot is using just 1 pot so you can see in my video that other than broiling the chicken in oven for 5 mins, everything was done in Instant Pot
  • I cooked the chicken in Instant Pot with just water. But after cooking, the water now has a lot of juice and fats from the chicken dripping onto them so make sure you drain all that liquid before you cook your rice. Needless to say – please dispose the liquid safely and not down your sink. I feel like everyone should know this lol but since I can be considered quite ditsy at times (more times than not), I figured let’s not assume everyone has common sense cos this Lazy Mommy doesn’t lol 😀
  • Because I use only coconut milk with the rice, I find that I need more salt than most coconut rice recipe. I estimate I used about 1/2 tsp and slightly more. If you are concerned about sodium, add the salt after rice is cooked so you can tailor to your taste buds

I can’t tell you how happy it makes me to not only be able to replicate our traditional Singapore dishes for my baby but also to see his happiness and joy at trying and liking these dishes. I really hope he grows up being a proud Canadian but also remembering his Singapore roots 😀

Is that too much for a Lazy Mommy to wish for? 😀

Instant Pot Nasi Lemak (Coconut Milk Rice)


Ingredients

  1. 1 Tsp Puree Ginger
  2. 2 Tsp Puree Garlic
  3. 1/2 Tsp Puree Turmeric
  4. 2 Tbsp Dark Soy Sauce
  5. 1 Tbsp Light Soy Sauce
  6. 1 Tbsp Oyster Flavored Sauce
  7. A dash of Sesame Oil
  8. 1 Tsp Sugar
  9. Chicken Thighs
  10. 2 Cups Basmati Rice (Rinsed and drained)
  11. 3 Cups Coconut Milk
  12. 1/2 Tsp Salt
  13. 2 Tsp Puree Garlic

Directions

  1. Add the first 8 ingredients together & marinate chicken in it for 1 few hours. Better overnight
  2. Add to Instant Pot on the trivet with 1 cup water
  3. Close lid, ensure vent valve is sealed and select Pressure Cook for 15 minutes. Once done, Natural Release 10 minutes before Quick Release
  4. Place chicken on greased baking tray and Broil on High for 5 minutes
  5. Drain the Instant Pot of the liquid (There is chicken oil so dispose of it safely and not down the sink)
  6. Add rice, coconut milk, salt and puree garlic in pot. Give it a good mix
  7. Close lid, ensure vent valve is sealed and select Pressure Cook for 5 minutes. Once done, Natural Release 10 minutes before Quick Release
  8. Plate and Enjoy

Instant Pot Singapore Chicken Rice

Singapore Chicken Rice – a humble dish created out of wanting to stretch the use of the chicken as much as one can. I’m sure that when the dish was created years & years ago, it never thought it will become one of Singapore National dish that is eaten all over the world…oh well, except in my part of the world where no other Singaporeans reside lol

According to David Farley’s article, Chicken Rice from Maxwell Food Centre in Singapore was worth him flying 15 hours from New York to come eat it. And get this, Chicken Rice is sold in many places in New York. David specifically flew to Singapore and went to Maxwell Food Centre to eat at 30-year-old food stall Tian Tian, a spot renowned for its Singapore chicken rice that has gotten praise from even the likes of Anthony Bourdain and Gordon Ramsay. 

Chicken Rice can be found ANYWHERE in Singapore. Not kidding. We love this dish so much. I can eat it 2-3 times a week. But while you can find it everywhere, there are only a selected few places that have made the top in not just my mind but in every Singaporean’s too. There would be a chicken rice place within 5 mins walking distance from where I live but I would have no qualms traveling all the way for 45 mins or more to another chicken rice place to join a insane long line just to eat what I feel is a better chicken rice version. My hubby often jokes that to get a Singaporean to love a food, just create a long line as a marketing strategy. He’s not exactly wrong LOL. We will line up to get good food but we are also very good at sussing out the bad places lol.

So now let’s talk about making it in the Instant Pot. I first saw the Instant Pot recipe on pressurecookrecipes.com and I was hooked. I really wanted to make it but felt it was too much steps for my tiny brain. So I thought maybe I could adapt it to make it simpler for me. I’m 100% positive theirs taste better but for the convenience and time saved for me, I am happy to compromise with what I feel is still a pretty ok recipe. It will never top my Favorite Chicken Rice in Singapore but it’ll do; my craving is satisfied & Ryan gets to experience his Singapore culture 😀 . That’s all that matters to me. I was worried Ryan wouldn’t like it but he LOVES it!!!

So Some Things About This Recipe:

  • This is a very humble Singapore dish but one that every Singaporean loves and is proud of. But not all my Canada friends would appreciate the white pale chicken that is fundamental to this dish. My hubby is one of them. So instead of needing to cook a separate dish for him, I just brush BBQ sauce on 2 of the chicken legs and broil them on High in oven for 10 mins and he gets BBQ Chicken Legs and we get our traditional chicken
  • I love using frozen chicken but ALWAYS make sure you separate the chicken pieces first before placing in pot. Either leave it out to thaw for a bit which is way too troublesome for me or defrost it in microwave for 10 mins. Chicken will still be frozen but you can now separate the pieces
  • The original recipe from Pressurecookrecipes.com has more steps than my recipe but I definitely took my inspiration from their recipe and I am 100% certain theirs must taste better than mine but I am not picky. I always think that any food that is made with love and patience always taste better and I have Love but definitely not the Patience LOL. I am honestly though quite happy with the results of my adapted recipe so this will work for my family but if you want an even better result, I suggest you follow the original recipe as I definitely took a lot of shortcuts. Thanks Amy & Jacky at Pressurecookrecipes.com!! 😀
  • Condiments are very important to us in eating this dish. I only had dark soy sauce so that’s all I used. But the original Singapore Chicken rice is served with freshly minced chilli sauce, garlic and ginger. I didn’t have all the above so dark soy sauce will have to do
  • While the chicken is an important part of the dish, the rice is really of the essence. That’s where the seasoning mix and that broth comes in. If you want to be even more lazy, use campbell chicken broth but for the rice to have that fragrance, oil from the chicken is important. Thus, cooking the rice with the broth that was used to steam the chicken helps make the rice so much nicer than using Campbell. While the chicken gets cooked, the chicken fat drips into the water in the pot making it the perfect rich chicken broth to cook the rice in.
  • I use puree for the seasoning mix but feel free to use fresh

Instant Pot Singapore Chicken Rice

Adapted From: www.pressurecookrecipes.com.


Ingredients

  • 4 Frozen Bone In Chicken Legs (Separate them first)
  • 3 Cups Water
  • 3 Cups Jasmine Rice (Better to wash & rinse them once but i didn’t)
  • Seasoning Mix: 4 Tbsp Puree Ginger/10 Cloves Puree Garlic/1 Puree Shallot/1 Tbsp Olive Oil (Puree them or just use store bought puree products)
  • Dark Soy Sauce as condiment
  • Sliced Cucumbers and Sliced Tomatoes as garnish

Directions

  1. Add all 4 frozen chicken legs in pot & add 3 Cups water
  2. Close lid & ensure vent valve is in sealing position. Select Pressure Cook for 25 minutes. Once it is done, do a Quick Release
  3. Once all pressure is released, open lid
  4. Plunge all 4 chicken legs into a ice cold water bath immediately to firm up skin & stop it from cooking further. Lay chicken aside
  5. Pour the broth from Instant Pot to a measuring cup. It came to about 4 cups of broth
  6. Add Rice to pot. Add 3 Cups of that rich chicken broth from Step 5 into pot
  7. Add the Seasoning Mix in pot and make sure you give it a good mix so the rice gets mixed well with the seasoning mix, as well as that rich juicy chicken broth
  8. Close lid & ensure vent valve is in sealing position. Select Pressure Cook for 5 minutes. Once it is done, wait for 10 mins. Once 10 mins is up, press Cancel
  9. Once all pressure is released, open lid & fluff rice with fork
  10. Lay your rice along with the chicken, dark soya sauce, sliced cucumbers & tomatoes & enjoy while it’s hot
  11. NOTE: Not everyone likes chicken the Singapore Chicken Rice way. Singaporeans love it but my hubby wouldn’t like eating pale white chicken lol. So best part – I used 2 chicken for Ryan & me and broil the remaining 2 chicken legs in oven brushed with BBQ sauce on HIGH for 10 minutes and TAH DA…now everyone is happy

Enjoy and I hope you like it as much as Ryan and I did 😀

Instant Pot Dill Pickle Wings

I confess that I actually do not like Dill Pickle all that much. I mean I like it as part of a bigger dish like in tuna or in potato egg salad but I have never liked to eat an actual dill pickle. Growing up in Singapore, Dill Pickle really hasn’t been something we have been exposed to.

It was actually just maybe a couple months ago that I by chance tried Dill Pickle Wings & I’m like OMG OMG OMG like where has Dill Pickle Wings been all MY LIFE lol….

Instant Pot Dill Pickle Wings

So ever since then, I have been looking online for recipes but every recipe I found has more steps than this Lazy Mommy wants to do. Bummer.

I thought about the Instant Pot. I have made wings a few times in the Instant Pot so I’m fairly comfortable but so far, my Instant Pot Wings have never required marination ahead not time.

I did try making it in my Instant Pot a few weeks ago using my usual method of cooking wings and without marinating it ahead of time. Sadly, it was a FLOP. It was good wings but it wasn’t Dill Pickle wings.

Decided to try again this last weekend. What changed was that I took the extra step to marinate the wings in Dill Pickle Juice for 8 hours. It definitely worked better than the last time but I still feel the pickle taste is not strong enough for me so I highly suggest marinating it overnight for the taste to be even stronger. Still really yummy wings & Chef Ryan approves it too 👌🏻👌🏻. Goes really great with Ranch dip or dressing.

Instant Pot Dill Pickle Wings - Lazy Mommy Version

  • Difficulty: easy
  • Print


Ingredients

  • Chicken Wings
  • 1.5 Cup Pickle Juice
  • 4 Tbsp Cooking Oil
  • 5 Tbsp Dill
  • Salt

Directions

  1. Marinate wings in pickle juice for at least 8 hours. Even better, marinate it overnight
  2. Add marinated wings to pot
  3. Add 4 Tbsp cooking oil, 5 Tbsp dill and a few dash of salt & give it a good mix
  4. Put lid on, make sure vent is set to seal.
  5. Select Pressure Cook and set time for 10 minutes. Once it beeps, it is done. Press Cancel. Do a quick release, open lid and stir it.
  6. Lay all the wings on a greased baking sheet. Important that baking sheet is greased.
  7. Broil it at High in oven for 10 minutes
  8. Enjoy while hot

Looks like Chef Ryan approves 😀
#toddlerapproved

Instant Pot Asian Braised Chicken Wings

Saw that I had a pack of wings in my freezer and thought about a dish that my mom would always make at home for us. It’s one of our family comfort food. It’s chicken wings braised in a saucy stew. Unlike most of my Western recipes when we usually need to thicken up the sauce, this recipe doesn’t call for that. We love the liquid stew drizzled over white rice. And that stew is perfect for putting in peeled hard boiled eggs, firm tofu and mushroom.

We usually eat this dish with steaming white rice and it’s a dish that my mom makes on a regular basis at our home. Obviously, her version is made more with love, patience and slaving over the stove. Mine is the lazy version 😀 .

This is the first time I tried cooking this in the Instant Pot but this is not the first time I have made wings in the pot so I more or less feel fairly confident that i can spin this off. I mean I know the basic ingredients. How hard can this be? And oMG it is seriously this easy. I just love it when I am able to recreate a family traditional recipe for Ryan.

So Some Things About This Recipe:

  • I use frozen wings but I did let them thaw slightly on kitchen counter as it is always advised to separate the wings in the pot. If your frozen wings are already separated, you do not need to thaw the wings at all and I would just increase cooking time from 15 mins to 20 mins.
  • My mom’s original recipe does not have sweet soy sauce but I always love dishes that are a blend of sweet and savory so I added the sweet soy sauce. If you can’t find sweet soy sauce but still want a sweetness to the sauce, just add 1/4 cup brown sugar.
  • Growing up, I remembered my mom dish being quite watery and we would just drizzle the sauce over our rice. That’s how I remembered it and how i like to eat it but feel free to thicken it up with some cornstarch if you prefer a thicker sauce.
  • This is a very common dish in many Singapore households but while the dish is fundamentally quite similar, every family cooks it slightly differently.
  • I would add chopped green onions and real sliced ginger. I just did not have these in my pantry today.

Enjoy 😀 😀 😀 😀 😀

Instant Pot Cajun Shrimp Pasta – Lazy Mommy Version

I am not kidding when I say this is like an amazing recipe 😀 . So I got home tonight and I honestly had no clue what to cook. Then I remembered I had a bag of Walmart frozen shrimps and half a bag left of Rotini. TAH DA!! I’m gonna make shrimp pasta. So I googled instant pot shrimp pasta for like 5 minutes (cos that’s all the time I had) and every recipe I see calls for heavy cream, which I don’t have. So, I decided “You know what? I’m gonna try and spin something out from my head” and believe me when I say that most of the time, when I cook without following a recipe, I have more FLOPS than SUCCESS but YAHOO!!!

THIS ONE IS A SUCCESS. IT’S A WINNER! 😀

I was really prepared to order Chinese Takeout last night lol.

So even though I say it is Cajun Shrimp Pasta, it honestly taste like Shrimp Aglio Olio to me. Luckily, I LOVE LOVE LOVE ❤ ❤ ❤ Aglio Olio. But I’m calling it Cajun Shrimp Pasta…. It’s like what I tell my hubby when he corrects my English “Whatever…Potato Potaato..they are the same lol”. It taste great and that’s all that matters 😎

So Some Things To Note for this Recipe:

  • I use frozen shrimp but feel free to use thawed shrimps. They work just as fine.
  • I use Campbell Lower Sodium Seafood Broth so I feel like I need to add more salt (my personal preference). If you are concerned about sodium, just add the salt at the end after you taste it and feels like you need more. Less is more when it comes to salt. Not like you can undo the salt.
  • I know of friends who uses garlic powder instead of minced garlic. If you are using garlic powder, I suggest you only add the powder towards the end after you have placed your pasta. That way, you don’t need to worry about the “BURN” message if you did not deglaze it properly.
  • I only had half a bag of Rotini (about 450 gram) but as you can see from video, there are definitely room to double the recipe. I will try that next week and update here if doubling the recipe works the same.
  • Everyone loves their pasta texture differently. I like it al dente but my hubby likes it softer. 5 mins for this dish works perfect for me but if you like it softer, just add another minute. I saw an online recipe that cooks the pasta for 9 mins. Personally, that’s wayyy too long for me.
  • Honestly, the original plan was to use Chicken Broth but I ran out and only had Campbell Seafood or Campbell Mushroom Broth so I just used the seafood broth but feel free to use chicken broth if that’s what you have.
  • Another confession lol – I had seen in one recipe to put in 1 stick of butter which equates to 8 Tablespoon butter. I thought I had a stick of butter. Sadly, I had like a small leftover piece of butter which comes up to about 3 Tablespoon butter & guess what, the dish is still incredibly tasty. If you prefer to add 1 stick butter, I’m sure it will just taste even better but I love that I didn’t have to give up the plan just because i am short of ingredients. If you try the 1 stick butter, let me know how it works for you.

With no further talking from this Lazy Mommy, give this Easy Peasy No Fuss recipe of mine a try and let me know your experience 🙂

Instant Pot Cajun Shrimp Pasta - Lazy Mommy Version

  • Difficulty: easy
  • Print

Ingredients

  • Cooking Oil
  • 2 Tsp Minced Garlic
  • 3 ½ Cups Campbell Lower Sodium Seafood Broth
  • 450 gram Rotini Pasta (about half a bag)
  • 3 Tsp Cajun Seasoning
  • Parsley
  • Black Pepper & Salt
  • 3 Tbsp butter cut into smaller pieces
  • 1 lb bag Frozen Shrimp

Directions

  1. Set Instant Pot to Saute function & add cooking oil
  2. When hot, add and saute minced garlic until it browns slightly
  3. Add 3.5 cups Campbell Seafood Broth. I use low sodium broth so you might need to put a bit more salt, depending on your taste buds
  4. Add pasta & give it a mix
  5. Add all your spices and seasoning & give it a good mix
  6. Dot top of pasta with butter cubes
  7. Dump bag of frozen shrimp on top
  8. Put lid on, make sure vent is set to seal.
  9. No mixing needed. Close the lid & ensure vent valve is in sealing position
  10. Cancel Saute function. Select Pressure Cook and set time for 5 minutes. Once it beeps, it is done. Press Cancel. Do a quick release, open lid and stir it. It might look slightly soupy at this point. Don’t worry. Give it a good stir. The pasta will soak up the liquid pretty fast.
  11. Serve it while it’s hot. Enjoy!

Instant Pot Beef Stroganoff – Lazy Mommy Version

We like Beef Stroganoff but prior to the Instant Pot, I don’t cook it as often as I would like to eat it but happy to say that now it is a staple and a regular meal at our home and it always turns out so delicious and creamy and so Easy Peasy 😀

So, it’s an understatement when I say that there are a lot of Instant Pot Beef Stroganoff recipes online but most recipes I have seen and tested has additional steps that I really feel is fine to skip but hey, you can be the judge here.

I dread cooking or doing any household chores. But there is no choice here. Cooking and household chores are part of Adulting, they say :/ . And this is truly why I see myself as a Lazy Mom. I feel too lazy to cook beautiful meals from scratch lol but I will go to great lengths to make any recipe or cleaning activity as short-lived and as easy as possible (like testing 6 different Instant Pot Beef Stroganoff recipes to figure out how to make the the process even shorter 😀 .

So the additional steps that I have seen online & tested myself so far includes:

  • Seasoning the beef first in a separate bowl
  • Browning the beef and when doing that, you have to do it at least in 3 batches meaning because you don’t want to crowd the pot and you need another plate to work through all the browning
  • If you brown the meat, you have to make sure you deglaze any browned bits from the bottom of the pot or the “BURN” message will show up on your instant pot
  • Cooking the mushrooms in a separate pan on the stove so the mushrooms doesn’t get mushy after 12 minutes of pressure cooking
  • Cooking the egg noodles separately on the stove
  • Using a bazillion spices to season the dish

Don’t get me wrong. There are some steps here that I will follow for a weekend dinner if I have friends or family coming over. I would totally use different spices and seasoning on a weekend but on a weekday evening after what feels like a long day of work, I just want to get home, get dinner ready as fast as I can and spend that time with my little boy & my couch & my TV so judge me if you want to but I’m using the onion soup mix as my seasoning for this dish and I am not cooking my egg noodles separately and I am definitely not browning the meat first in batches. And one easy tip so that your mushrooms doesn’t get super mushy after 12 minutes of cooking, just don’t slice the mushrooms. Just throw in the mushrooms as it is.

So, to each their own but give this Easy Peasy No Fuss recipe of mine a try and let me know your experience 🙂

Instant Pot Beef Stroganoff – Lazy Mommy Version.

Instant Pot Beef Stroganoff - Lazy Mommy Version

  • Difficulty: easy
  • Print

There are a lot of Instant Pot Beef Stroganoff versions online but most recipes I have seen has a few more additional steps. Way too many steps for this mama especially on a weekday night after a full day work. I need something Easy Peasy. The less work, less plates to wash after, the better. And truly, I think this is really yummy even without the additional steps. Give this a try and let me know what you think.

Ingredients

  • 2 to 3 TBSP Cooking Oil
  • 1 chopped onion
  • Mushrooms (use as much as you like but don’t slice it smaller)
  • Stewing Beef
  • 1/4 cup all purpose flour
  • 1 Packet Onion Soup Mix
  • 3 Cups Low Sodium Beef Broth
  • 3-4 dash of Worcester Sauce
  • Dash of Black Pepper
  • 1 package of egg noodles
  • 3/4 cup sour cream

Directions

  1. Set the Instant Pot to Saute function. When the Instant Pot is hot, add oil, onion and mushrooms. Add as much mushroom as you like. I just only had that small bowl of mushroom in my fridge. Saute it for a minute.
  2. Add stewing beef. No browning or seasoning ahead of time required. Add 1/4 cup all purpose flour and give it a good stir.
  3. Quick Tip: Put your own seasoning by all means but when I get home on a weekday night after a day of work and I need to get dinner ready fast for my 2 year old, a packet of Onion Soup Mix as seasoning never fails me.
  4. Add 3 cups of beef broth. I use low sodium beef broth since the onion soup mix already has plenty sodium. Give it a good mix.
  5. Cancel Saute function and press Pressure Cook and set time for 12 minutes. Once it beeps, it is done. Do a quick release, open lid and stir it.
  6. Add Worcester sauce (about 3-4 dashes) and some black pepper. Add 1 package of egg noodles and give it a good stir.
  7. Set Pressure Cook & set time for 5 minutes. Once it beeps, your noodles are cooked. Do a quick release, open lid and stir it.
  8. Add 3/4 cup sour cream and mix it
  9. Serve it while it’s hot. Enjoy

Instant Pot Chinese Glutinous Rice 糯米饭

I have made so many of our meals in our Instant Pot but this is my very first video of a Instant Pot Recipe 🙂 I am definitely still learning how to make cooking videos and would love to hear any feedback in the Comments section below. Thanks for watching.

A Simple Homemade Dish My Mom Always Made

Instant Pot Chinese Glutinous Rice 糯米饭

  • Difficulty: easy
  • Print

Credit: Twosleevers.com.

While I didn’t follow the recipe in Twosleevers.com to the tee, I did get my main cooking instructions from there and it works! I also didn’t have the most authentic ingredients like dried shrimp & dried mushrooms for this recipe so i replicated this dish using other ingredients. Feel free to use marinated chicken slices or cubes to replace the Chinese sausage. Traditional Chinese Glutinous Rice doesn’t actually have any vegetables in them but I added spinach so Ryan can have his vegetable serving as well when he has this for lunch. You want to be careful to not just use any random vegetables as cooking vegetables in Instant Pot for 10 minutes will make most vegetables all mushy and way too soft for my liking.

Ingredients

  • 1 chopped onion
  • 2 sliced Chinese sausages
  • 1 cup rinsed Jasmine rice
  • 2 cups spinach
  • 1 Tbsp Soy Sauce/1 Tbsp Oyster Sauce/pinch of sesame oil mixture
  • 2 cups water or chicken broth

Directions

  1. Press Saute Function on Instant Pot and add a Tbsp Oil.
  2. When the Instant Pot is hot, add all ingredients except water and saute for 2 minutes.
  3. Add water or no salt chicken broth.
  4. Cook on high pressure for 10 minutes, and then allow it to release pressure naturally for 10 minutes. Then release all remaining pressure.
  5. Open the Instant Pot & stir to mix well.
  6. Leave it open with no lid to allow excess water to absorb before serving.

Instant Pot

Saying I love my Instant Pot is totally an understatement.

I love to bake but boy, cooking is definitely my nemesis. In my Barbie Fantasy land, I bake in a cute apron with perfect skin and hair of course & sip my cup of coffee leisurely while my son plays quietly on his own with his Daddy Ken who says Yes to everything his Barbie Mommy says hahaa but nowhere in my Fantasy land do I ever do any cooking. Yup, this is how much i do not like cooking and in my reality, I do not bake in a cute apron…Most times, i am just in my ratty pajamas with my messy hair and definitely not perfect skin lol….& no, my toddler who is rarely quiet and Daddy Ken definitely does not say YES to me LOL…

But okay, back to the Instant Pot. Many friends have asked me if an Instant Pot is really all that great. My answer is YES to us moms who hates and is not a good cook. My answer is Maybe or even Nope to you moms who are great cooks and can whip up a dinner PEW PEW just like that.

For good cooks, the Instant Pot would still be great for something like ribs when it significantly cuts down the amount of time needed for the meat to get sooo ooey gooey tender but I think there is something very beautiful about creating a beautiful meal for your family from scratch the traditional way – no shortcuts no gimmicks so before you run out to get an Instant Pot, think of what gives you more gratification – a beautiful homemade meal or a faster way to get back to my couch & TV lol….ya, no competition there for me. And if you do intend to buy one, do yourself a favor and get either the 6 quartz or 8 quartz one. The 3 quartz, in my opinion would be too small for me even if I was a single. I cook for 3 to 4 people daily and the 6 quartz suffice for us but I do have the 8 quartz too.

Instant Pot, however is not a magical pot for all recipes:

  • Fried Rice – as it name depicts, it really taste bad ass when fried rice is ermmmm….fried. Yes to cut time, I will continue to cook it in the instant pot but nothing beats fried rice being fried in a pan or a wok
  • Lasagna – I’m sorry but when I tell hubby I am making Lasagna for supper & he sees me cooking Deconstructed Lasagna soup in my Instant Pot, it just ain’t the same. Still taste good but it ain’t Lasagna :/
  • Roast Chicken – I have tried a no. of recipes from different websites but still not really liking the final result but if you have a winning recipe, please share it with this mama! 🙂

Instant Pot, however is MAGICAL 😀 for the following recipes:

  • Split Pea & Ham Soup – OMG OMG OMG to be able to dish out a yummy split pea soup within an hour is like SUPERCALIFRAGILISTICEXPIALIDOCIOUS Amazing!!! Best thing is you don’t even need to soak those bad bass peas overnight…It’s that easy.
  • Prep Ahead Chicken Breasts for the week – Best thing is you can cook them from frozen chicken breasts, shred or slice them and now you have chicken strips for your stirfry any of the evenings when you are short of time!! I hate touching raw chicken EEEKKK o_O
  • Chinese Beef & Broccoli – Okay. This recipe itself deserve a blog post on its own and I’ll get to it. The first few times were flops for me but by trial & error, I actually figured out a way to make the beef tender but the broccoli doesn’t go mushy and yes, I only used one pot.
  • Ribs – Enuff Said…Just read all the raving reviews on Pinterest
  • Chicken Wings – Cook and Broil and all the flavor gets ingrained into those wings
  • Cabbage Soup / Chicken Rice Soup / Vegetable Soup – Perfect for those cold harsh winter evenings
  • Beef Stroganoff – Cooked together with the egg noodles, one less pot or pan to wash in my household is a win for me
  • Cashew Chicken – I don’t even eat cashew chicken in Singapore but oh well, it does taste good and cashews has so much nutrition
  • Beef Goulash – I pronounce it as Goo.Lash…my hubby says I’m wrong
  • Chinese Congee – For those days when hubby is not home. Despite what he claims, this man does not like authentic Asian food :roll:. Lucky for me, my son loves all Asian food so far and so when hubby is not around or when Ryan is feeling under the weather, Chinese Congee is our comfort food to go to.
  • Pad Thai – I love Pad Thai but I hate making them in a pan. So far, I have had equal success and fails in making them in the Instant Pot. I honestly think I just am not measuring stuff right
  • Made from scratch Apple Cider Drink – Oooooooo I made that for Christmas and my house smells amazing….:star: that’s a winning recipe for me

There are so many other Instant Pot recipes out there so if you have tried an Instant Pot recipe and it is a success for you and family, I would love to hear it from you in the comments.

Bye bye for now while I decide what to cook tonight in my Instant Pot 🙂 #InstantPotSavedMyMarriage is a Real Thing people!! 😮

LAZY MOMMY GUIDE

WHEN LIFE GIVES YOU LEMONS, BAKE...

The Gastronomy Gal

all things food and nutrition

Your Home for Homemade Japanese Food

How to cook "with visual instructions" "using familiar ingredients from your local grocery stores" healthy, traditional and delicious Japanese dishes!!

mumsinreallifecouk.wordpress.com/

Just two mums, sharing our experiences

In Dianes Kitchen

Recipes showing step by step directions with pictures and a printable recipe card.

BeautyBeyondBones

Because we’re all recovering from something.

Smitha's Bake Love

Let's bake Simple & Healthy from your Pantry !!!

ice cream magazines

................... for lovers of ice cream. Your free on line magazine for sweet frozen treats. Recipes, inspiration, artisanal ideas for your delectation.

YummyHood

Welcome to the YummyHood!

Cooking Without Limits

Food Photography & Recipes

Discover WordPress

A daily selection of the best content published on WordPress, collected for you by humans who love to read.

Nuts And Bolts

The Basic How-to's

@myfoodswings

Different moods, Different foods :)