Easy Peasy Egg Tarts

Honestly, never even really occurred to me where egg tarts actually come from… as in from which culture. Growing up, I always remember eating them when my parents would bring us to go eat dim sum on weekend mornings. Those were very fond memories indeed. These days, you can pretty much eat dim sum any day.

But this I do know – while it is a Asian dish, it has influences from the Portuguese. Might be the reason why some Asian places call them Portuguese Egg Tarts.

So usually, I will try to make my own crust and I have a really wicked awesome flaky pie crust which I feel will work great for the egg tarts but this weekend, Ryan and I werenโ€™t feeling really well so I just really didnโ€™t feel like making it from scratch so store bought ones will have to do for this weekend ๐Ÿ˜€

And really, Tenderflake Tart Shells works perfect with Egg Tarts.

There are many many egg tart recipes but remembering that this is a Easy Peasy one, so I did skip some steps such as straining the egg mixture. Straining the egg mixture/filling helps remove any lumps and ensures your custard filling comes out looking smooth & pretty.

Also, it usually ask you to chill the filling in fridge first. Again, skipped by this mommy. One thing to note too that my original recipe usually uses evaporated milk but sometimes when I dun have that, I use my coffee cream instead. I just use 2 tbsp of coffee cream instead of 1/4 cup evaporated milk.

Since I am baking for my family and not to sell, I really could care less about straining it. Maybe when I have more time or when I decide to see if anyone will buy it from me at the Farmers Market lol

Here goes the super easy ingredients:

  • 1 box of Tenderflake Tart Shells (12 tarts)
  • 4 beaten eggs with a pinch of vanilla extract & salt
  • ยพ cup hot water
  • 6 tablespoons sugar
  • 1/4 cup evaporated milk

My Easy Peasy Lazy Mommy Recipe:

  • To make the custard filling, stir in sugar in hot water and let it cool slightly
  • Once water is cooled, add in your beaten eggs, vanilla, salt and evaporated milk. If you donโ€™t have evaporated milk, I would just add 2 Tbsp of coffee cream or half & half
  • Mix it all up thoroughly
  • Strain it if you want your custard to look smooth and pretty and without lumps but I didnโ€™t.
  • Pour it into the 12 tart shells till about 80% full
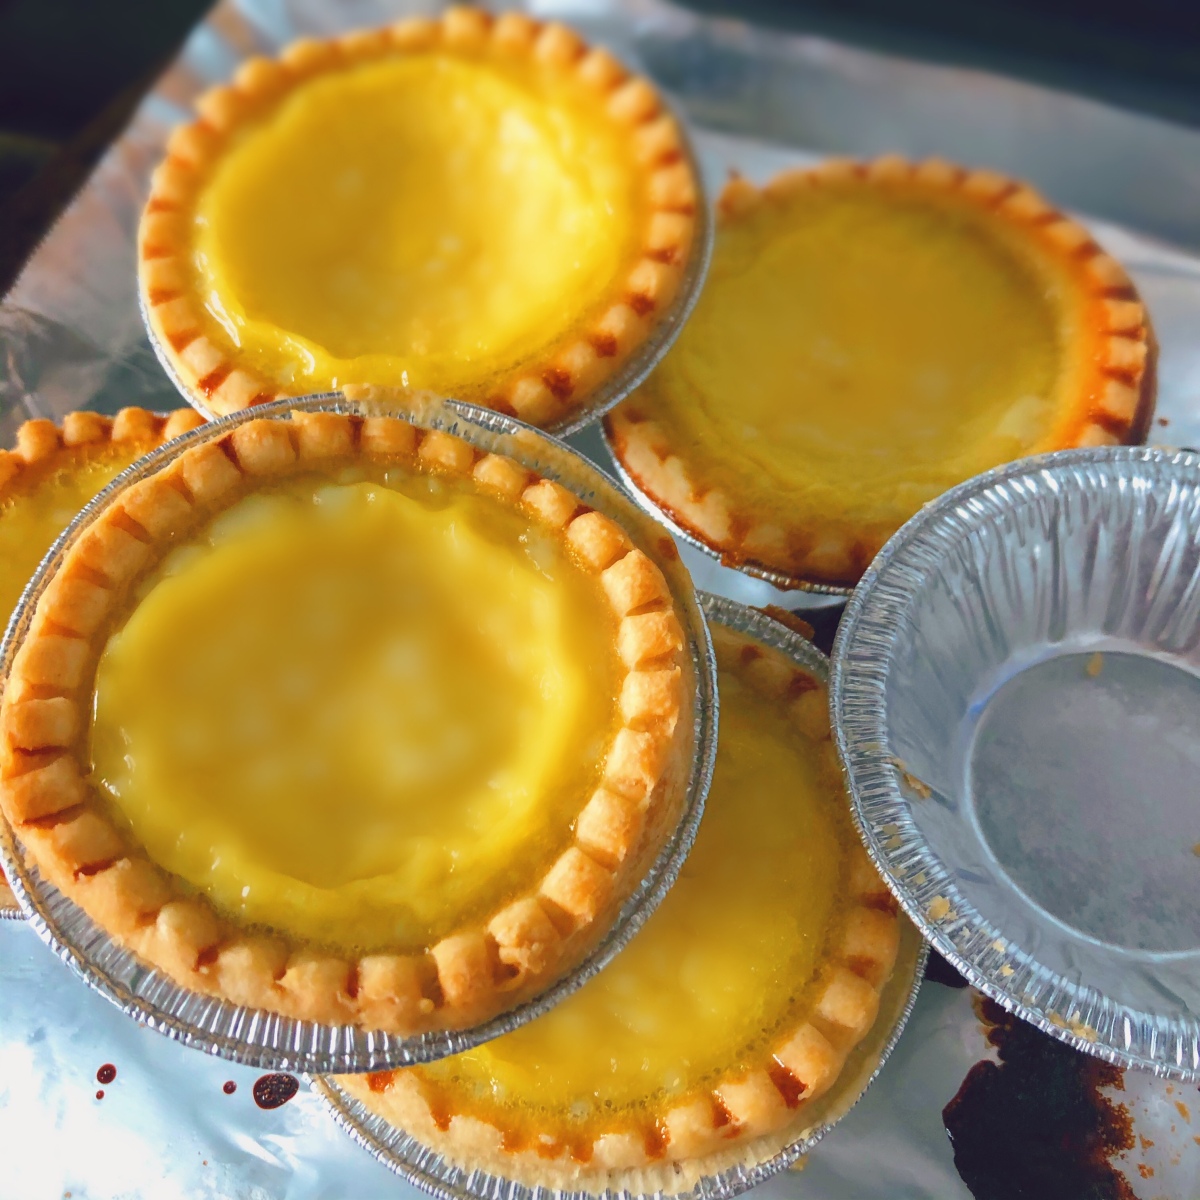
  • Bake at 400 f for 20-25 mins. Mine came out at 25 mins Cos I filled the tart shells to the brim lol. But if you fill it to 80% full, 20 mins works suffice

And that is it. Super easy. Super lazy recipe. And now my son gets to have a taste of what my parents would bring me to eat on a Sunday morning ๐Ÿ˜€ and he ate 2 for breakfast this morning so Iโ€™m gonna call that a Mommy Win!

๐Ÿ˜Ž ๐Ÿ˜Ž ๐Ÿ˜Ž ๐Ÿ˜Ž ๐Ÿ˜Ž ๐Ÿ˜Ž ๐Ÿ˜Ž ๐Ÿ˜Ž

Homemade Chinese Shrimp Balls ่™พไธธ

For my western friends who have no idea what this is – it really is not too different from your meatballs except this is minced shrimps shaped into balls ๐Ÿ˜€

One thing I want to incorporate at our Chinese New Year Party is the Hot Pot or Steamboat and to me, fish balls is to Hot Pot like Cheese is to Fondue. It just feels odd without fish balls at my Chinese New Year dinner. I can get frozen fish balls here but they really dun taste as good as the fresh ones we get in the supermarkets in Singapore and I really didnโ€™t want to treat my guests to sub par fish balls. I thought okay maybe I could make the fish balls myself .. I mean how hard can that be right? Lol

Oh well, too bad my town or nearby towns doesnโ€™t the kind of fish I need to make yummy fish balls. Sure, I could drive 7 hours to Edmonton but hmmm if Iโ€™m already there, I might as well buy the fish balls instead of the fish to make it ๐Ÿ˜€

Then it occurred to me that why not make shrimp balls ๐Ÿฅฐ๐Ÿฅฐ.. they are as yummy and easier to make. So there we go ๐Ÿ˜€

Ingredients:

  • Finely minced Shrimps (I use about 18 medium shrimps and mince it in my food processor)
  • Dash of salt
  • Dash of white pepper
  • Dash of Ground Ginger (optional)
  • Dried chives (as much or as little as you like)
  • 3 tsp corn starch
Super Easy Peasy

Instructions:

  1. Combine all the ingredients and stir them until everything is well mixed
  2. They say to best stir them in one direction till well mixed but oh well, I forgot lol but they still tasted pretty good ๐Ÿ˜€
  3. Place covered in fridge for a few hours
  4. Boil some water or broth and while boiling, place the shrimp paste in by spoonful. I use a teaspoon but you can use a tablespoon and make the shrimp balls bigger. It really is your own personal preference.
  5. It cooks very fast and once the shrimp balls float to surface, they are done ๐Ÿ™‚

I tried a few today and they tasted great! Now the challenge is to not finish them before my CNY Party LOL….These do freeze really well so for those of us who can’t just conveniently get fresh fish balls or prawn balls, this is a great alternative. Make a big batch and freeze them.

Are you all prepared for your Chinese New Year? I know I’m not but I’m definitely using any free time I have now to prep for our Chinese New Year.

HUAT AH!!

Instant Vortex Plus Asian Chicken Wings

Yahoo! Finally it’s the weekend & I get to try out my Christmas Gift from my hubby – the Instant Pot Vortex Plus Air Fryer ๐Ÿ˜€ & I LOVE LOVE LOVE it. They got me at Deep Fried Juicy Chicken Wings LOL

So while it’s called an Air Fryer, IT BOASTS a total of 7 functions!! Well, I hope the other 6 functions lives up to the Air Fryer function I used tonight :D. Only time and a lot of cooking will tell ๐Ÿ˜€

With this appliance, you can Air Fry, Roast, Bake, Broil, Reheat, Dehydrate and Rotisserie cook your food…I don’t know how other Vortex Plus users feel but I kinda feel like this is my adult version of the Easy-Bake Oven LOL. Oh well, i must be missing my childhood ๐Ÿ˜€

Anyhow, I got this at Christmas and when i did the initial testing as per the instruction manual, i was really disappointed at how loud the appliance was. And I was actually having thoughts about returning the product. I am so glad though that I decided to give it a try first because I can tell you this!!

This Bad Ass Vortex Plus is not going anywhere!!! I love it! ๐Ÿ™‚

So let me tell you about these Chicken Wings. I love love love Chicken Wings! But I am quite picky about my Chicken Wings. My favorite chicken wings are from a food stall in Singapore Ghim Moh Market. You know that I’m a serious fan when the owners of the food stall knows me hahaha..

Since moving to Canada many years ago, I have found other good chicken wings but never found one that could rival my favorite in Singapore. So, I can’t believe that the first wings I made using my Vortex Plus tonight actually reminds me of my favorite wings in Singapore. So much so that I ate 3 chicken wings after 9:00pm…Oops I dun even want to think about how many calories that is but whatever. Clean eating can come another day lol.

It’s a really easy recipe too ๐Ÿ™‚

Ingredients:

  • Whole Chicken Wings
  • 2 Tbsp All Purpose Flour
  • 2 Tbsp Corn Starch
  • 1/4 tsp white pepper
  • 1/4 tsp black pepper
  • Pinch of onion powder
  • 1/4 tsp garlic powder
  • 1 tsp salt
  • 1/2 tsp sugar
  • 1.5 tbsp Soy Sauce
  • 1/2 tbsp water
  • 1 Egg
  • 1 tsp Sesame Oil
  • Less than a tsp of oil (to grease the 2 grill plates slightly)

Instructions:

  1. Marinate the chicken wings in all the ingredients except oil and leave it in fridge for 2 hours for better tasting chicken wings
  2. Note that I had enough marinate for 14 wings but the Vortex Plus could only hold 10 whole chicken wings comfortably
  3. Start the Air Fryer function at 380 F or 193 C and set time to 30 minutes
  4. Once it beeps and signals to “Add Food”, insert your 2 grill trays with the wings in. You can see in video I didn’t use oven mitts at this stage but I highly suggest you wearing one every time you insert a tray in cos it just takes a second of carelessness to get yourself burned
  5. Midway through, it will signal you to switch the trays
  6. Switch the 2 trays and close the oven (MAKE SURE YOU USE OVEN MITTS!!)
  7. 30 minutes of waiting is over and I eagerly get my wings out!!
  8. REMEMBER THE OVEN MITTS! I can’t emphasize that enough.
  9. Enjoy! ๐Ÿ˜€

Enjoy the video and the wings & let me know how it turns out for you or share with me your favorite chicken wing recipe!

I know my 2 favorite men gave them the Thumbs Up! ๐Ÿ˜Ž ๐Ÿ˜Ž ๐Ÿ˜Ž That make this Lazy Mommy soooo very happy

LAZY MOMMY GUIDE

WHEN LIFE GIVES YOU LEMONS, BAKE...

The Gastronomy Gal

all things food and nutrition

Your Home for Homemade Japanese Food

How to cook "with visual instructions" "using familiar ingredients from your local grocery stores" healthy, traditional and delicious Japanese dishes!!

mumsinreallifecouk.wordpress.com/

Just two mums, sharing our experiences

In Dianes Kitchen

Recipes showing step by step directions with pictures and a printable recipe card.

BeautyBeyondBones

Because weโ€™re all recovering from something.

Smitha's Bake Love

Let's bake Simple & Healthy from your Pantry !!!

ice cream magazines

................... for lovers of ice cream. Your free on line magazine for sweet frozen treats. Recipes, inspiration, artisanal ideas for your delectation.

YummyHood

Welcome to the YummyHood!

Cooking Without Limits

Food Photography & Recipes

Discover WordPress

A daily selection of the best content published on WordPress, collected for you by humans who love to read.

Nuts And Bolts

The Basic How-to's

@myfoodswings

Different moods, Different foods :)